
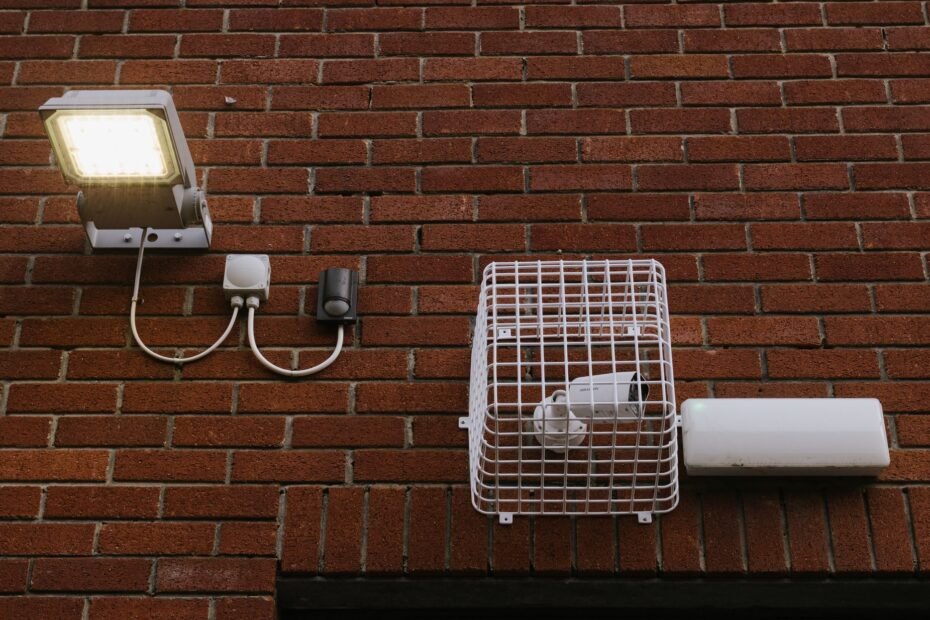
After shutting off power at the breaker, map the area to be lit, mount a weatherproof fixture, and connect labeled conductors. Your PIR sensor needs a cross-path view, or a bright driveway fixture can leave the front walk dark.
This walkthrough covers placement, power choices, weatherproof wiring, and nighttime adjustments for your driveway, gate, side yard, or entry path.
Coverage Area and Power Source Set the Project Scope
A garage light may leave a gate 40 feet away in darkness. Mark the routes you travel after dark, including the front walk, driveway edge, side yard, rear path, trash area, and gate latch. Your sketch should show entry points, shadowed spots, and fixture locations that see movement without facing the street.
For example, a fixture beside a side-door landing can light the steps and narrow path along the house. A garage-mounted LED floodlight can light parked vehicles and the front-door approach, yet its sensor may not reach a detached shed. Your coverage need determines the power source and fixture location.
Power Options Set Installation Limits
| Power option | Your installation limits | Your expected reliability |
|---|---|---|
| Hardwired fixture | Your location needs a sound outdoor electrical junction box and a suitable branch circuit. | Your fixture stays ready without battery charging or sunlight. |
| Plug-in fixture | Your cord must reach a weather-protected outdoor receptacle without crossing a walkway. | Your light depends on that receptacle and weather-rated cord protection. |
| Battery fixture | Your mounting point needs no wiring, though access for battery changes matters. | Your output and run time fall as batteries drain in cold weather. |
| Solar fixture | Your solar panel needs direct sun for much of the day. | Your winter runtime depends on daylight, panel angle, and shade. |
A hardwired fixture suits a busy entry where your light must operate through long winter nights. Plug-in, battery, and solar units fit remote spots, though storms, short daylight, and repeated activation expose their limits. Your choice should match the route, mounting surface, and available power.
An existing exterior box gives you the simplest outdoor motion sensor light installation. The box needs sound conductors, a secure mounting surface, and room for the new fixture base. Damaged insulation, a loose box, or unidentified wires turn a fixture swap into work for a licensed electrician.
Once the circuit and box are judged safe, the fixture’s location determines whether its sensor sees useful movement.
Placement Controls Useful Motion Detection
Your coverage sketch now shows where the sensor should face. A PIR (passive infrared) motion sensor reacts to heat changes moving across its detection zones. Movement across those zones produces a stronger signal than movement straight toward the fixture.
Mounting Height and Angle Shape Detection
Mount outdoor fixtures 6 to 10 feet above grade, subject to the height and coverage limits printed for your model. Your mounting height changes range and blind spots. A fixture mounted too high can send the detection field beyond the path, while a low fixture faces bumps and splashing.
Point the sensor across the walking route. At a front door, aim the field across the sidewalk approach rather than down its length. Your movement then crosses more sensing zones before reaching the handle.
False Activations Start With the Sensor View
- Street traffic: Keep your detection field clear of passing vehicles, especially near a driveway corner.
- Public sidewalks: Turn the sensor away from pedestrian traffic beyond your property line.
- Moving branches: Trim vegetation that swings through your sensing area during wind.
- Warm air vents: Keep the fixture away from dryer vents, heat pumps, and exhaust outlets.
- Reflective surfaces: Avoid aiming toward pale walls, windows, pools, or shiny vehicle panels.
Set the sensor angle before final tightening. A 10-degree tilt can move the outer edge of your detection range several feet at ground level.
For example, a rear-path fixture aimed diagonally across a six-foot walkway can detect a person leaving the back door while ignoring traffic beyond the fence. That view matters more than turning sensitivity to its highest setting.
Electrical Safety and Weatherproofing Come Before Mounting
A properly aimed sensor still relies on a dry, secure connection behind the fixture. Turn off the circuit breaker serving the exterior light, then verify power is absent with a voltage tester before opening the fixture or touching conductors. Your wall switch alone does not prove the wiring is de-energized.
Weatherproof Parts Keep Moisture Outside
Mount the fixture to a securely fastened weatherproof electrical box, not directly to siding, trim, or an unsealed wall opening. Your outdoor electrical junction box must carry the fixture weight and keep conductors enclosed. A foam gasket closes the fixture base against the box face.
Water moves through gravity, capillary gaps, and cable openings. Leave factory drainage paths open at the bottom of the fixture. Caulk belongs only in locations permitted by fixture instructions because a sealed bottom edge can trap water behind the base.
Unclear Wiring Requires a Stop
- Shut off power: Turn off your circuit breaker and verify zero voltage before removing cover screws.
- Inspect the box: Confirm that your box is rigid, weatherproof, and free of cracks or rust.
- Inspect conductor insulation: Stop work where insulation is brittle, burned, nicked, or wet.
- Find the grounding path: Confirm that your box and fixture have a usable equipment grounding path.
- Review local rules: Check whether your outdoor circuit needs GFCI protection under local requirements.
The National Electrical Code sets broad electrical rules, while local inspection offices can add requirements. Your area controls the final installation standard.
A GFCI-protected circuit cuts power after a ground-fault event. Your exterior lighting circuit may already have protection at a receptacle, circuit breaker, or panel location. Confirm its presence and function before wiring work continues.
Mounting and Wiring the Motion Sensor Fixture
With the box secure and power absent, you can mount the fixture without trapping wires or moisture. Set out the mounting strap, gasket, exterior-rated wire connectors, screwdriver, voltage tester, and fixture instructions before removing the old unit.
Fixture Labels Direct Each Wire Connection
How to wire a motion sensor light depends on the labels inside the fixture housing. A standard unit has a line or hot connection, a neutral connection, and an equipment ground connection. Your motion sensor light wiring diagram must match those marked terminals or leads.
Most 120-volt hardwired motion fixtures need a neutral wire because the sensor electronics need steady power. Some older switch-loop boxes lack a neutral. Your fixture cannot use an absent or unidentified conductor as a substitute.
Mount the Fixture in a Dry Sequence
- Remove the old unit: Inspect your box, mounting strap, ground connection, and conductor insulation after power verification.
- Attach the mounting strap: Fasten the supplied bracket to your junction box with hardware intended for that box.
- Join labeled conductors: Connect your hot, neutral, and ground conductors with exterior-rated wire connectors.
- Tuck wires gently: Fold your conductors into the box without pinching insulation beneath the fixture base.
- Seat the gasket: Tighten the fixture evenly against your box while leaving bottom drainage openings clear.
Leviton and Lutron controls can form part of a broader exterior lighting setup, while Ring and Philips Hue fixtures add connected features. Your wiring still follows the fixture label, box capacity, and local electrical rules rather than a brand app.
Once installation meets those requirements, darkness reveals blind spots and nuisance triggers that daylight testing can conceal.
Nighttime Testing Fine-Tunes Coverage
After the base is tight and the gasket sits flat, restore power at the circuit breaker. Many fixtures enter a short setup mode after energizing, allowing the sensor to activate in daylight. Your manual states the timing for that mode.
Walk the Actual Route After Dark
- Confirm lamp output: Check that your lamp activates and reaches the ground without harsh glare at eye level.
- Cross the detection field: Walk your intended path from both directions at the outer edge of coverage.
- Reduce overreach: Lower your detection range until cars, walkers, and neighbors remain outside the active zone.
- Set time delay: Start with 1 to 3 minutes for an entry, then lengthen it for loading or trash tasks.
- Set the photocell: Adjust your dusk-to-dawn photocell after dark so daylight does not activate the lamp.
Your sensitivity dial controls how readily the PIR sensor reacts, while range controls how far the field reaches. Small changes give you clearer results than full turns. A high setting can detect a pet near the wall or a vehicle beyond the driveway.
Example: a garage light that detects a person at 25 feet but activates for road traffic needs less range, not more brightness. Walk the route after each adjustment. Your light should activate before you reach the dark step and remain quiet beyond the property edge.
Targeted Fixes Address False Triggers and Wiring Symptoms
A light that activates through the night points to a placement, setting, or control issue. Start with the symptom rather than moving every dial at once. Your last adjustment stays clear when you change one setting per evening.
| Symptom | Probable cause | Your focused fix |
|---|---|---|
| Light activates for passing cars | Your sensor field reaches the street. | Turn your sensor inward and lower the detection range. |
| Light activates in wind | Your branches enter the sensing field. | Trim vegetation or move your detection angle away from it. |
| Light stays on | Your override, timer, or photocell setting is engaged. | Reset power, check your manual override sequence, then reset time delay. |
| Light misses visitors | Your sensor faces the path head-on or sits too high. | Aim your PIR sensor across the walking route and recheck height. |
| Light stays dark at night | Your photocell sees nearby light or your circuit has a wiring fault. | Shield the photocell from fixture glare, then inspect your labeled connections. |
Manual override settings can make a fixture act like a regular porch light after a quick switch sequence or power interruption. Restore the switch to its normal position and allow the sensor its reset period. Your fixture manual gives the exact sequence.
Bring in a licensed electrician for a loose box, missing ground wire, damaged conductors, unclear line and load wires, or code work beyond a direct fixture swap.
How to install outdoor motion sensor lights safely ends with a fixture that responds to your route rather than every movement nearby. Your final check should cover rain exposure, gasket fit, a stable mounting base, and a quiet sensor field.
Reliable Light Comes From Three Linked Choices
Your fixture needs a secure weatherproof box, your PIR sensor needs a cross-path view, and your settings need a calm check after dark. Walking your actual route for a few minutes reveals blind spots and false triggers before they become a nightly nuisance.
UL-rated outdoor fixtures, secure wire connectors, and a properly fitted weatherproof electrical box cover keep the electrical parts enclosed. Your motion sensor sensitivity settings then control the area your fixture watches, rather than the entire street or yard.
FAQ
How do you wire an outdoor motion sensor light?
Your fixture wires connect by labels inside its housing: line or hot connects to the incoming hot conductor, neutral connects to the neutral wire, and ground connects to the equipment grounding conductor. Turn off your circuit breaker and verify no voltage before each connection. Exterior-rated wire connectors and a weatherproof box protect your wiring from moisture.
Do motion sensor lights need a neutral wire?
Continuous power for the sensor electronics means most hardwired 120-volt motion sensor lights require a neutral wire. Your older exterior box may contain switch-loop conductors rather than a neutral. Stop work where conductor identity is unclear because guessing can damage the fixture or create a shock hazard.
Where should outdoor motion sensor lights be placed?
Your fixture belongs near the route needing light, such as an entry, garage approach, gate, or rear path. Mount it about 6 to 10 feet high unless fixture instructions state another range. Aim the PIR sensor across the route and away from roads, moving trees, vents, and reflective surfaces.
How do you adjust the sensitivity and range on a motion sensor light?
Set your sensitivity and detection range after dark, then walk across the edge of the intended field. Lower range before lowering sensitivity where traffic activates the fixture. Your sensor should detect a person approaching the door or gate while ignoring activity beyond the area you want lit.
Why does my outdoor motion sensor light stay on all the time?
Your light can stay on because manual override is active, the time delay is too long, the photocell sees darkness, or the sensor detects constant movement. Reset power, check the switch sequence in your manual, lower sensitivity, and move the sensor away from branches, vents, or road traffic.
Can I replace an existing outdoor light with a motion sensor light myself?
A weatherproof, firmly attached box with adequate conductor space and sound wiring can support a motion sensor light replacement. A loose box, damaged insulation, missing ground connection, or unclear conductors call for a licensed electrician before mounting your new fixture.