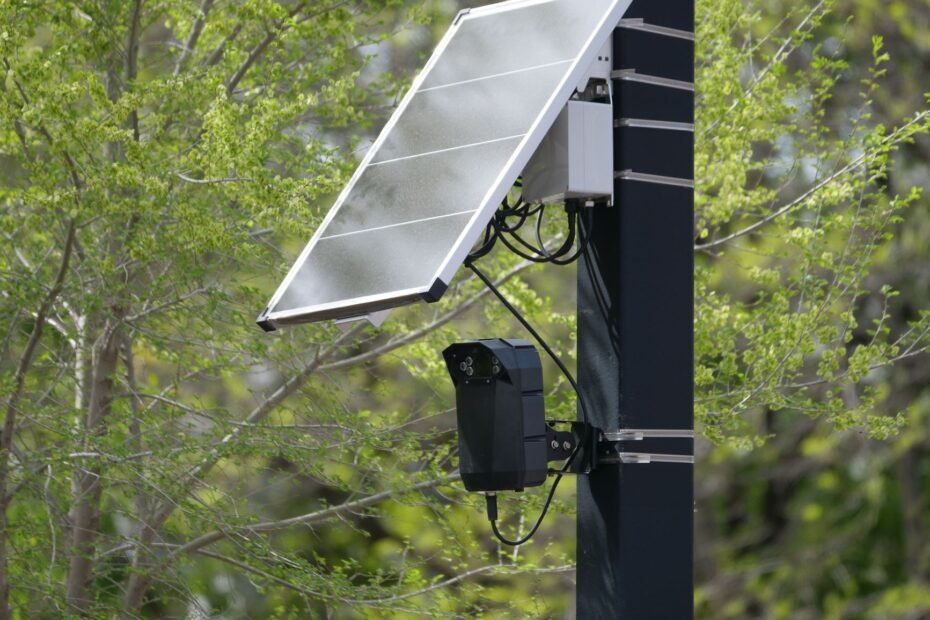
After charging the unit and switching it on, place it in setup mode and add it through its mobile app on a compatible local network. Solar power charges the battery, while Wi-Fi carries live video, alerts, and remote access between your camera and router.
This walkthrough covers network checks, QR code pairing, outdoor signal testing, solar panel placement, and repair steps for your driveway, gate, yard, or outbuilding.
Power, Battery, and Wi-Fi Have Separate Jobs
Solar-powered security cameras rely on three separate systems: daylight charging, stored battery power, and wireless network access. Your solar panel supplies energy, the battery runs the camera after dark, and your Wi-Fi router sends video and alerts through the local network.
Power and network service stay separate
| Part of the setup | What it does for you | What it cannot do |
|---|---|---|
| Solar panel | Recharges the camera battery from daylight. | Does not create a Wi-Fi signal or internet access. |
| Battery | Keeps your camera running through clouds and nighttime. | Does not deliver remote alerts by itself. |
| Wi-Fi router | Links your camera to the home network. | Cannot overcome dense brick, metal, or excessive distance. |
| Internet service | Allows remote live view, cloud uploads, and app notifications. | Does not charge the camera battery. |
Ring, Arlo, Reolink, and Eufy Security cameras use a mobile security camera app during enrollment. The app passes your network name and password to the camera through QR code pairing, Bluetooth, a temporary camera network, or a brand-specific pairing method.
Local storage changes what happens during an internet outage. Some models retain motion clips on a microSD card or internal storage, but your phone cannot receive remote alerts or live video until the camera reconnects to the network.
That division affects your mounting choice. A sunny roofline does not solve a poor connection when the camera sits beyond the usable signal from your Wi-Fi router.
Wi-Fi Band Choice and Outdoor Coverage Shape the Mounting Location
Signal quality matters at the exact outdoor mounting point, not beside your router. Most battery cameras use a 2.4 GHz Wi-Fi network because the lower-frequency signal reaches farther through exterior walls than a 5 GHz Wi-Fi network.
Wi-Fi bands trade speed for reach
| Network band | Outdoor behavior | Camera pairing result |
|---|---|---|
| 2.4 GHz | Reaches farther through wood, drywall, and light vegetation. | Works with many solar camera models. |
| 5 GHz | Offers more speed but loses strength faster through obstacles. | Works only on cameras that list 5 GHz capability. |
| Dual-band router | Broadcasts both bands under separate or shared names. | Needs clear band selection during setup on some models. |
Check the camera label, box, or app requirements before pairing. A 5 GHz-only network cannot enroll a 2.4 GHz-only camera, even where your phone shows a strong signal beside the router.
IEEE 802.11 describes the Wi-Fi standards used by cameras and routers. WPA2 works with a broad range of cameras, while a WPA3-only setting can block older battery models during enrollment.
Physical barriers reduce usable range
Brick, metal siding, foil-backed insulation, wet leaves, parked vehicles, and garage doors weaken radio signals. Your solar security camera Wi-Fi range can drop sharply after the signal passes through two exterior walls and a metal door.
Run a phone Wi-Fi check at the proposed mount before drilling. A full phone signal is encouraging, but the camera still needs a stable connection after installation.
A Wi-Fi extender or mesh Wi-Fi system can bring coverage closer to an exterior wall. A mesh node suits broader coverage, while an outdoor access point fits a detached garage, long driveway, or gate with a clear path back to your main network.
For example, a camera on a sunny fence post 90 feet from the house may receive enough daylight but still show delayed alerts. A mesh node inside the nearest window can close that radio gap without moving the solar panel.
Once coverage is adequate, preparation helps prevent setup mistakes from being mistaken for weak signal.
Camera, Phone, and Network Preparation Reduces Pairing Errors
A low battery can interrupt enrollment before the camera reaches your network. Charge the battery to the level stated by the manufacturer, attach the solar panel as directed, and power on the unit before opening the app.
Preparation removes common setup failures
- Charge the battery Give your camera enough stored power to stay on through the full pairing sequence.
- Enter setup mode Press the setup or network-reset control until the status light or voice prompt shows enrollment mode.
- Install the app Sign into your camera account and allow camera, local-network, Bluetooth, and notification permissions as prompted.
- Join the proper band Put your phone on the same compatible 2.4 GHz Wi-Fi network intended for the camera.
- Verify credentials Enter your Wi-Fi password carefully, including capital letters, spaces, and punctuation.
Your phone can join a 5 GHz band while the camera needs 2.4 GHz. Separate router band names, such as Home-2G and Home-5G, make the correct choice clearer where router controls allow separate names.
Guest networks and captive portals can interrupt camera access after enrollment. Guest-network isolation keeps connected devices apart, so your app may not locate the camera even after it joins the network.
Phone hotspots deserve caution because camera brands vary in hotspot compatibility. Use a hotspot only where the camera maker lists that connection method for your model.
Mobile App Pairing Transfers Network Details to the Camera
Select the exact camera family in the mobile security camera app before starting enrollment. Status-light colors, spoken prompts, and reset timing vary across models, including models from the same brand.
Enrollment follows a short sequence
- Add the device Open the app, select your camera model, and start the new-device enrollment flow.
- Enter network details Select your 2.4 GHz Wi-Fi network and enter the password with each character checked.
- Transfer credentials Hold the app-generated QR code about 6 to 12 inches from the lens, or join the temporary camera signal.
- Wait for confirmation Leave the camera powered on until the app shows an online status and live video.
- Name the camera Use a location name such as “East Gate” so your alerts remain clear after more cameras join your account.
QR code pairing uses the camera lens to read encrypted network details from your phone screen. Window glare, a dim screen, fingerprints on the lens, or holding the code too close can stop the camera from reading it.
Keep the router, phone, and camera in the same room during enrollment. Your wireless solar security camera installation can move outdoors after stable live view appears, rather than forcing the camera to handle setup and distance at once.
Do not close the app after the status light changes. Wait for a live image and a connected label, because some cameras complete account registration after joining Wi-Fi.
A successful pairing has two visible signs: the app shows the camera online, and live video remains open without repeated loading. Those signs matter more than a single sound prompt or color change from the camera.
Outdoor Testing Shows Whether the Camera Has Enough Signal
A temporary test at the planned mount exposes weak coverage before you drill into a wall or post. Bring the connected camera to that location with the panel loosely placed, then watch live video for buffering, delayed alerts, or repeated reconnection.
Live use reveals signal quality
- Open live view Watch a stable image for several minutes rather than relying on one successful frame.
- Trigger motion Walk across the detection area and check whether your phone receives an alert without a long delay.
- Check two-way audio Speak through the app and listen for clipped sound where your model includes audio.
- Restart the app Close and reopen it to confirm the camera reconnects without manual action.
- Review signal status Use the app’s Wi-Fi indicator or RSSI value, where shown, to spot a marginal connection.
Wi-Fi signal strength, shown as RSSI, means received signal strength indicator. A number closer to zero is stronger, so -55 dBm is healthier than -75 dBm, though each camera maker sets its own working threshold.
Solar panel placement cannot overcome weak Wi-Fi
Place the solar panel where it receives clear daylight while keeping the camera within useful coverage. Your panel cable may allow the panel to sit in sun while the camera stays under an eave, away from glare and rain exposure.
Test the camera after dark as well as during daylight. A connection that seems stable during a quiet afternoon can weaken during busy evening Wi-Fi activity inside your home.
Move the camera a few feet before adding network hardware. A shift away from metal trim, a downspout, or a brick corner can improve the path between your camera and the Wi-Fi source.
When placement changes fail to restore a reliable link, a structured repair sequence avoids random resets.
Failed Pairing and Offline Cameras Follow a Short Repair Order
Band mismatch, password errors, weak signal, and incompatible network security account for many connection failures. Start with the camera’s listed Wi-Fi band and password, then move toward router settings and physical coverage.
Pairing failures respond to a fixed order
| Symptom | Likely cause | Practical fix |
|---|---|---|
| Camera cannot find network | 2.4 GHz band is unavailable or merged poorly. | Turn on 2.4 GHz and assign it a separate network name during pairing. |
| Password rejected | Typing error or unsupported security mode. | Re-enter credentials and use WPA2 or WPA2/WPA3 mixed mode where available. |
| QR code will not scan | Glare, poor screen brightness, or wrong distance. | Raise screen brightness and hold the code 6 to 12 inches from the lens. |
| Camera goes offline outdoors | Weak router signal strength at the mount. | Move a mesh node closer or add an outdoor access point. |
Restart the camera and router after checking your credentials. Place the camera near the router for another enrollment attempt, return it to setup mode, and reserve a factory reset for a camera that remains stuck after those steps.
Network changes require a fresh enrollment
Changing your router name or Wi-Fi password breaks the saved connection. You need to reconnect solar security camera to Wi-Fi through its app after that change because the camera cannot learn new credentials by itself.
MAC filtering can block a new camera before it reaches the app. Hidden network names can also cause trouble because some camera apps do not pass a nonbroadcast network name cleanly during setup.
Firmware updates can repair known connection errors after the camera is online. Keep your battery charged during an update, and do not cut power while the app shows installation progress.
A camera that reconnects indoors but drops offline outdoors points to coverage rather than app settings. Move the mesh node, extender, or access point closer to the camera before repeating the pairing process.
Practical Takeaways for a Stable Solar Camera Connection
Your camera needs three conditions at the same mounting point: usable daylight, enough battery charging, and stable Wi-Fi. Set up the device beside the router, confirm live video at the outdoor location, then add coverage hardware where signal strength falls short.
Solar power solves the energy side of the installation. Your network solves remote viewing, alerts, and cloud access, so both systems need attention before you finalize the mount.
FAQ
How do I connect my solar security camera to Wi-Fi?
Charge and power on your camera, place it in setup mode, and open its manufacturer app. Select the correct model, put your phone on the compatible network band, enter your Wi-Fi password, then finish QR code pairing or the app’s temporary setup-network method.
Why won’t my solar powered security camera connect to Wi-Fi?
Your camera may need 2.4 GHz while your phone or router uses 5 GHz. Wrong passwords, weak signal strength, guest-network isolation, WPA3-only security, a hidden network name, and an expired setup mode can also stop enrollment.
Do solar-powered security cameras need Wi-Fi to work?
Your camera needs Wi-Fi for remote live view, phone alerts, cloud uploads, and most app controls. Models with local storage can retain motion clips during an internet outage, but you cannot view those clips remotely until the network returns.
Do most solar security cameras connect to 2.4 GHz or 5 GHz Wi-Fi?
Many battery-powered solar cameras connect through a 2.4 GHz Wi-Fi network because that band reaches farther through walls. Some newer models also join 5 GHz, but your camera needs listed 5 GHz capability before that band will work.
How do I connect a solar-powered security camera to my Wi-Fi using the app?
Open the manufacturer app, select your camera model, and start the add-device flow. Enter the compatible network name and password, then scan the app QR code with the camera lens or join the temporary camera network shown by the app.
How close does a solar security camera need to be to the Wi-Fi router?
Distance alone does not set the limit because walls, brick, metal, trees, and nearby wireless traffic change the signal path. Your useful limit is the point where live video stays stable and alerts arrive without repeated offline notices.