
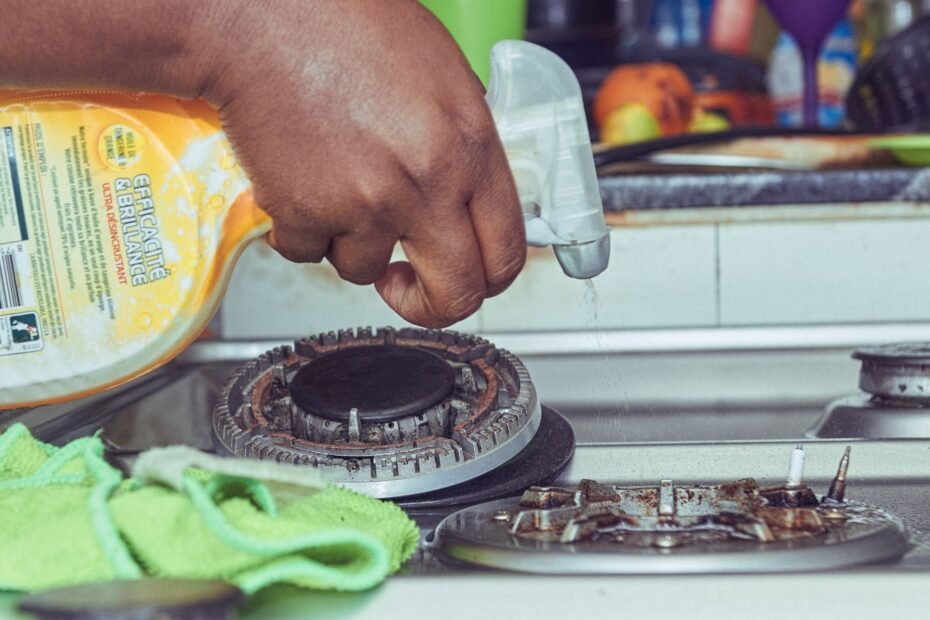
On a cool appliance surface, the cleaner, moisture level, and scrubbing pressure should match the residue and surface beneath it. Heat bonds oil, crumbs, and dust into a sticky film, so your stovetop, hood, microwave, and oven need different cleaning methods.
This practical walkthrough covers fresh splatters, cooked-on residue, removable parts, and delicate finishes for anyone keeping a working kitchen clean without damaging appliance surfaces or controls.
Grease Level, Surface Type, and Safety Set the Method
A shiny smear needs far less pressure than a brown crust beside a burner. Fresh grease feels slick and lifts with warm soapy water, while sticky film has collected dust and food particles. Carbonized residue has hardened through repeated heat exposure, so it needs longer contact time rather than harsher scrubbing.
Your surface matters as much as the grease itself. A rough pad that clears a cast-iron grate can scratch a ceramic glass cooktop or dull painted metal. Check appliance manufacturer cleaning instructions before removing knobs, burner caps, filters, or panels.
Three Grease Levels Need Different Responses
- Fresh splatters: Wipe cooled surfaces with warm water, dish soap, and microfiber cloths before oil collects dust.
- Sticky film: Rest a soapy cloth over the area for 2 to 5 minutes, then wipe without hard pressure.
- Baked-on spots: Cover residue with baking soda paste and lift it with a nonabrasive scrubber after brief contact.
- Carbonized crust: Work in small patches and repeat a mild method before moving to a labeled degreasing spray.
Start with a cool appliance. Unplug countertop appliances before cleaning, and allow hot metal, glass, and oven interiors to cool fully. Ventilate the room before opening a strong degreasing spray, especially near an oven cavity or range hood.
Electrical Areas Need Dry Control
Liquid can travel behind a control panel through a narrow seam. Keep moisture away from igniters, burner openings, heating elements, displays, vents, plugs, and electrical seams. Dampen your cloth rather than spraying cleaner onto buttons or panels.
Dry seams with a clean towel after wiping. Your control panel stays safer when cleaner reaches the cloth instead of the appliance face, particularly around buttons, display edges, and vent slots.
Water can travel behind a control panel through a narrow seam. Put cleaner on your cloth, not the appliance face, near buttons, displays, plugs, and vent slots.
A Mild-to-Strong Cleaner Sequence Reduces Surface Wear
Residue that feels slick responds to dish soap before it needs anything stronger. Dish soap contains surfactants, which surround oil so water carries it away rather than spreading it across the finish. Your first pass should loosen grease without scratching the surface below it.
Move up only after the gentle method leaves visible residue. Baking soda paste adds mild grit for small cooked-on patches, while a labeled commercial degreaser suits heavy grease on compatible finishes. More strength brings more risk around paint, aluminum, coatings, and seams.
Warm Soapy Water Handles Everyday Grease
| Cleaner level | Works well for | Method |
|---|---|---|
| Warm water and dish soap | Fresh splatter and tacky film | Wipe with a damp microfiber cloth, rinse the cloth, then wipe again. |
| Baking soda paste | Small baked-on patches | Spread a thin layer, wait 5 to 10 minutes, then lift with a soft sponge. |
| Commercial degreaser | Heavy grease on suitable finishes | Follow the label, ventilate the room, and wipe food-contact areas with clean water. |
Dawn is a familiar dish soap option because its surfactants break up cooking oils in warm water. Dawn Powerwash can work on a removable drip pan or greasy refrigerator handle, though a light spray on a cloth gives you better control near seams and controls.
Baking Soda Paste Adds Mild Grit
Mix baking soda with enough water to form a spreadable paste, not a dry powder. The paste stays on a cooled oven wall or burner cap and softens cooked-on residue without the scratch pattern left by steel wool.
Commercial products have a narrower role. Bar Keepers Friend contains an abrasive cleanser that can mark delicate coatings, while Easy-Off oven cleaner can damage aluminum, painted surfaces, and coated parts. Try a pin-size patch in an inconspicuous area before treating a broad panel.
Rinse food-contact surfaces with a separate cloth dampened in clean water. Cleaner residue can leave streaks, odors, or a tacky feel that attracts fresh soil.
Cleaner Compatibility Changes With Appliance Finishes
The same grease film behaves differently on brushed steel, coated metal, and glass. A cleaner can loosen grime yet still cloud a finish, strip a coating, or leave fine scratches that catch light across an appliance door.
| Surface | Safer starting method | Skip or limit |
|---|---|---|
| Stainless steel finish | Warm soapy water and grain-direction buffing | Abrasive pads and circular scrubbing |
| Painted metal | Lightly damp soapy cloth | Harsh oven cleaner and scouring powder |
| Glass and ceramic glass | Cool-surface cleaner and soft cloth | Rough pads, dry scraping, and harsh abrasives |
| Aluminum | Dish soap and a soft sponge | Strong alkaline oven cleaner |
| Enamel and nonstick coatings | Soapy water and a nonabrasive sponge | Steel wool, abrasive powders, and hard scraping |
| Plastic control panels | Cloth lightly dampened with soapy water | Direct sprays and soaked cloths |
| Electrical areas | Dry cloth or barely damp cloth | Spraying liquid into openings or seams |
Your stainless steel stove stays clearer with wipes that follow the grain, followed by a dry microfiber cloth. Circular rubbing leaves visible swirls even after the grease lifts. Stainless steel surfaces show streaks fast, so a clean-water wipe and dry buff matter after any cleaner.
White Vinegar Has Limits Around Grease
White vinegar can cut mineral haze and light residue, yet it is not a universal degreaser. Dish soap works better on oily film because surfactants emulsify grease instead of merely wetting it. Keep vinegar away from surfaces where manufacturer instructions restrict acidic cleaners.
Never mix vinegar with bleach or another chlorine-based cleaner. Hazardous gases can form, so clear the area, rinse one product away fully, and dry the surface before using another cleaner. Your safest routine keeps cleaner bottles separate rather than layering products.
Once products are isolated and fully removed, dwell time and gentle agitation can loosen baked-on residue safely.
Stovetops and Ovens Need Controlled Soaking and Scrubbing
Burner grates and oven racks hold thick grease because heat bakes splatters into corners and wire joints. Treat removable parts as separate soak-and-scrub work instead of flooding the fixed appliance surface. This approach keeps water away from igniters while giving grease time to soften.
Stovetop and burner grates need patience more than force. A nylon brush reaches underside bars and corners, while a hard metal tool can chip enamel or remove a protective coating. Your goal is softened residue that releases in layers, not bare metal scraped under pressure.
Removable Stovetop Parts Soften in a Soak
- Cool all parts: Turn off the appliance and wait until grates, caps, and nearby metal feel completely cool.
- Remove permitted pieces: Lift grates, drip pans, knobs, and burner caps only where manufacturer instructions allow removal.
- Soak with soap: Place removable parts in hot soapy water for 15 to 30 minutes while keeping igniter pieces dry.
- Wipe fixed areas: Clean the stovetop with a damp cloth while staying clear of burner openings and igniters.
- Dry before reassembly: Towel-dry every part before putting it back so trapped water does not affect ignition or leave marks.
For sticky spill rings, rest a warm soapy cloth over the residue before using a nylon brush. The moisture loosens the bond between grease and metal, which keeps your scrubbing lighter and helps protect enamel-coated burner caps.
Oven Residue Responds to Short Contact Time
To remove baked-on grease from oven surfaces, spread baking soda paste across the cooled oven interior while avoiding heating elements, door seals, fan openings, and light covers. Leave the paste for 10 minutes, then loosen soil with a damp nonabrasive sponge.
Stop scrubbing once a coating dulls, chips, or changes color. That visible change means your next move should be a different cleaner or more soak time, not more pressure. Oven racks can soak separately in hot soapy water before a nylon brush reaches the wire joints.
That same restraint helps remove grease without damaging thinner coatings, vents, and reflective exterior finishes.
Microwaves, Range Hoods, and Exteriors Need Targeted Care
Steam loosens microwave interior film without sending cleaner into vents or keypad seams. Heat a microwave-safe bowl of water until the interior turns steamy, allow it to cool, then wipe softened grease with a damp cloth. Your microwave interior should feel clean, not slick, after the wipe.
Range hood filters trap airborne oil before it lands on cabinets and walls. That captured oil makes filters sticky over time, so a full soak and complete drying matter more than aggressive brushing. Clean grease off stove hood and range surfaces with a cloth rather than direct spray near controls.
Hood Filters Need Full Drying
Remove washable range hood filters where appliance manufacturer cleaning instructions permit. Soak them in hot soapy water, brush lightly, rinse, and allow them to dry fully before reinstalling. A damp filter can drip onto the cooktop or reduce airflow through the hood.
Some filters need a manufacturer-specific method rather than soaking. Your filter should sit flat and dry before it goes back into place. Check the frame, mesh, and retaining tabs for grease left in corners before returning the filter to the hood.
Exterior Touchpoints Collect Finger Oils
- Refrigerator handles: Wipe with a lightly damp soapy cloth, then remove soap residue with a clean-water cloth.
- Door fronts: Work from top to bottom so dirty liquid does not run across cleaned areas.
- Microwave controls: Put cleaner on the cloth and keep moisture away from button edges.
- Stainless surfaces: Buff dry in the grain direction to remove haze and leave an even sheen.
Affresh appliance wipes can suit exterior touchpoints where the label permits, though warm soapy water is enough for fresh fingerprints. Your final dry buff matters because leftover moisture turns into streaks on stainless steel surfaces and refrigerator doors.
Drying finishes each session, while prompt routine cleaning prevents fresh grease from becoming a harder residue.
A Regular Cleaning Rhythm Keeps Grease From Hardening
Fresh splatters take little time, while old grease needs soaking, scrubbing, and repeated rinsing. You can limit buildup through short tasks linked to cooking rather than rare deep-cleaning sessions. This is how to prevent grease buildup in the kitchen without turning every appliance into a weekend project.
A monthly filter check also shows whether cooking vapor is moving through the hood as it should. Sticky mesh, dull metal, and greasy cabinet edges point to oil that has stayed in the air path too long. Your schedule can stay simple because each task targets a specific grease source.
After-Cooking, Weekly, Monthly, and Seasonal Tasks
- After cooking: Wipe cooled splatters from the stovetop, handles, and nearby appliance fronts with a damp soapy cloth.
- Each week: Clean stovetop details, microwave walls, turntable, hood exterior, and refrigerator handles.
- Each month: Check range hood filters, removable grates, drip pans, and visible oven spills for sticky buildup.
- Each season: Soak oven racks, deep-clean drip pans, wipe refrigerator exteriors, and inspect neglected hood components.
Switch methods rather than scrubbing harder where grease does not lift. More dwell time, warmer soapy water, or suitable baking soda paste protects finishes far better than an abrasive pad. Keep clean microfiber cloths separate from cloths used on grates and oven racks, since trapped grit can scratch smooth glass and steel.
Final Cleaning Principles
Grease removal works as a sequence: identify the residue, protect the surface, start mild, allow contact time, rinse cleaner away, and dry thoroughly. Your patience matters most on baked-on soil. A soaked grate or softened oven spot responds to controlled cleaning, while hard scrubbing can leave damage that no cleaner can hide.
Dish soap remains the starting point for fresh grease, baking soda paste suits small hardened patches, and a labeled degreaser belongs on compatible heavy soil. Your final clean-water wipe removes residue that leaves surfaces tacky, while dry buffing keeps stainless steel, glass, and painted metal clearer.
FAQ
What removes old, sticky grease from kitchen appliances?
Warm water, dish soap, and a microfiber cloth remove old sticky grease after 2 to 5 minutes of contact. For residue that remains brown or firm, use baking soda paste on a cool compatible surface. Your follow-up clean-water wipe removes loosened soap and grease film.
Can dish soap and baking soda remove baked-on grease safely?
On a cool cooktop, dish soap cuts oily film, while baking soda paste loosens small baked-on spots. Use both on cool, compatible surfaces and skip abrasive pads. Your appliance manufacturer cleaning instructions take priority around coated surfaces, aluminum, nonstick parts, and specialty finishes.
How do you clean grease from a stovetop and burner grates?
Wipe the cooled stovetop with a damp soapy cloth while keeping liquid away from igniters and burner openings. Soak removable stovetop and burner grates in hot soapy water for 15 to 30 minutes, brush with nylon, rinse, and dry fully before reassembly.
How do you degrease oven racks and the inside of an oven?
Soak removable oven racks in hot soapy water, then use a nylon brush on wire joints and corners. For the oven interior, place baking soda paste on cooled baked-on spots for 10 minutes. Keep paste away from heating elements, seals, fan openings, and light covers.
What is the safest way to clean greasy range hood filters?
Remove washable filters only where appliance manufacturer cleaning instructions permit. Soak the filters in hot soapy water, brush lightly, rinse them well, and dry them completely before reinstalling. Your hood works better with a flat, dry filter seated securely in its frame.
Can vinegar damage stainless steel, glass, or appliance coatings?
White vinegar can leave problems on surfaces that do not tolerate acidic cleaners, especially where a coating has special care instructions. Dish soap is the stronger choice for grease because it emulsifies oil. Your safest choice is the cleaner method listed for the specific appliance finish.